This Website for raising knowledge in technical part of windows,linux and mobile technology
Jul 27, 2009
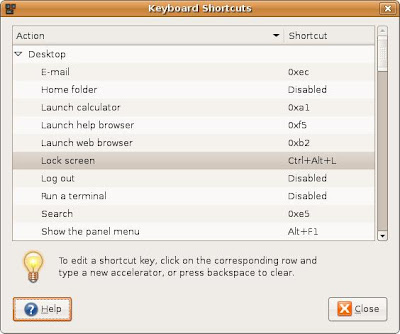
Linux Keybroad Shortcut
KEYBOARD SHORTCUT KEYS
CTRL + B Moves the cursor backward one character.
CTRL + C Cancels the currently running command.
CTRL + D Logs out of the current session.
CTRL + F Moves the cursor forward one character.
CTRL + H Erase one character. Similar to pressing backspace.
CTRL + P Paste previous line and/or lines.
CTRL + S Stops all output on screen
CTRL + Q Turns all output stopped on screen back on
CTRL + U Erases the complete line.
CTRL + W Deletes the last word typed in. For example, if you typed 'mv file1 file2' this shortcut would delete file2.
CTRL + Z Cancels current operation, moves back a directory and/or takes the current operation and moves it to the background. See bg command for additional information about background.
More Helpful Shortcut
~ Moves to the user's home directory.
!! Repeats the line last entered at the shell.
!$ Repeats the last argument for the command last used.
reset Resets the terminal if terminal screen is not displaying correctly.
shutdown -h now Remotely or locally shuts the system down.
Jul 2, 2009
SquirrelMail replaces Microsoft Outlook in the office of the Indian Prime Minister
I have found the following interesting news from SquirrelMail.org’s website
(http://www.squirrelmail.org/index.php)
is enough to open eyes and minds of the government of under-developed countries (as ours), and a signal to act accordingly.
Here is the text directly from that site, from their News section.
NEWS: SquirrelMail replaces Microsoft Outlook in the office of the Indian Prime Minister
Mar 25, 2009 by Paul Lesniewski
Several news outlets (Techgoss, infopackets, The Register, The Times of India, etc.) are reporting that after a virus prevented email retrieval for three months in the office of the Prime Minister of India, SquirrelMail was chosen as part of a replacement system that had previously been based on Microsoft products. This surely means that several other Open Source products were included in the switch, and we applaud both the Office Of the Prime Minister and its technology consultants who made the switch to Open Source Software
Uninstalling Linux
Hi,
In this HOW-TO i'm going to try to explain how to uninstall linux without messing up your windows partition. I feel this is a area that isn't really touched upon that much and most newbies need help with it. I know when I was a noob I didn't like linux because I hadn't knew how to uninstall it. But now I feel I know enough to write a tutorial on how to do it and explain the steps.
1. Removing Your Disto
The easiest way uninstall linux is probably from a Windows XP CD. Once you boot from the CD follow the instructions until you get to the part where you see all the partitions on your hard drive. You must delete all your linux partitions. The primary partitions you'll probably see are
linux ext3, linux ext2, linux swap.
You should delete all these partitions to remove your distro.
2. Fixing your Master Boot Record
Most people know how to uninstall their distro. But afterwards their presented with a black screen and grub asking for input
grub>
or something similar to that. This is were I got totally confused when I was first starting linux. I had no idea what to do so I just re-installed my distro, which actually fixed the problem but I wanted linux totally gone. Enough about me let's get back uninstalling linux. Boot off the Windows XP CD and after windows loads type r to get to the Recovery Console. Once you in the the Recovery Console you'll probably be prompted to type the administrator user name and password. I ususally just put admin as the user name and nothing as the password and it usually works. But that is just my settings your might be different, but usually admin and no password works fine . Now were in recovery console all we have to do is type:
fixmbr
this command will re-write the Master Boot Record, therefore removing Grub.
3. Finished
Now just type shutdown -r this will restart the computer. Remove the Windows XP CD. Now when the computer starts you should be greeted with the all familiar Windows Startup Screen.
Subscribe to:
Posts (Atom)